Blog

  • What the evidence says about ultra-processed food

    What the evidence says about ultra-processed food

    Ultra-processed food is a commercially manufactured product that contains ingredients you would not cook at home. This processing can make foods more appealing, increase shelf life, and even make them more affordable. Wholemeal supermarket bread is a good example.

    Scientists have known for a long time that foods with high saturated fats, salt, sugar, and calories, or those with too little whole grains, fiber, and other nutrients, increase the risk of certain health conditions, such as obesity, hypertension, and heart disease.

    Many ultra-processed food products will not have these nutritional profiles, but some do. The idea that ultra-processed foods are dangerous is a new one.

    Van Tulleken’s books argues that the problem is not nutrition, but the ultra-processing. In a musing about why some pizzas aren’t good for our waistlines, he writes that “the only thing to consider is whether or not it is ultra-processed.” Van Tulleken claims that ultra-processed foods are linked to more deaths and early deaths globally than tobacco.

    A great deal of what is being said here is wrong.

    Myths examined

    No scientific study has ever shown that ultra-processed food is the leading cause of death worldwide.

    This bold but misleading claim is, in my opinion, a misinterpretation of research that suggests poor diet is a leading cause of death. In this study and others, the majority of deaths that are attributed to poor nutrition are caused by factors like not eating enough fruits and vegetables, oily fish, and wholegrains.

    There is no strong evidence to suggest that the ultra-processed status of a food will affect its health.

    Many studies show people with diets high in ultra-processed foods have a poorer quality of life than those who consume less ultra-processed foodResearch indicates that some specific kinds of ultra-processed food foods are linked to poorer health.

    It includes sugary beverages and processed meats, which have been known to be bad for your health for a long time. It is not true that eating other foods classified as ultra-processed will lead to a worse. Some studies even show that they predict better health. Brown cereals and bread are examples.

    “observational” studies are the basis of most scientific studies that show harm from ultra-processed food. Researchers don’t alter a person’s eating habits to observe their health. Instead, they look at what people report to eat to determine how they feel.

    Not all ultra-processed food is associated with poorer overall health. Dar1930/Shutterstock

    In this way, observational studies cannot account for the differences between people who consume a lot or fewer ultraprocessed food.

    It is important to understand that ultra-processing is not harmful. There are factors unmeasured about the person or diet which can cause health problems. This is perfectly captured in a recent study.

    It was, as shown in other a href=” https://pubmed.ncbi.nlm.nih.gov/37087831/#:%7E:text=Conclusion%3A%20In%20conclusion%2C%20the%20available%2C%20breast%2D%20and%20pancreatic%20cancer.”>studies/a>. As demonstrated by further research, it was. It also examined whether ultra-processed foods were associated with an outcome that should not be possible: accidental death. People who consume a lot of ultra-processed food are more likely to be involved in accidents such as car crashes, falls, and other types of accidents.

    No plausible explanation exists for why processed foods could cause death. It’s more likely that something else has been overlooked or mismeasured, a factor known as “confounding factors”.

    People with poorer mental health are also more likely to die in an accident. People with lower backgrounds and worse health are more likely to consume ultra-processed foods.

    It is possible to measure an individual’s income. However, it is very difficult to accurately measure the effects of poverty and mental illness on physical health. These factors may, therefore, be confounding and make it appear that ultra-processed foods are associated with worsening health like cancer.

    You’d expect that, given the fear and dread surrounding food processing, there would be convincing evidence that demonstrates how food processing can harm human health. There is no evidence. Scientists from the US, UK, and Australia (with and without food industry funding histories) all agree.

    There’s a good reason for more research on ultra-processed foods and their health. This is far from Van Tulleken’s claim that we eat “food that isn’t food” and that ultra-processed foods are worse for our health than tobacco.

    The hype around ultra-processed foods is problematic, as it can cause unnecessary anxiety in people who are already struggling with their eating habits or worried about their health.

    The ultra-processed foods hype can confuse the public about what foods are healthy and which ones are not. It may also divert attention away from the government’s need to take action against the food industry for marketing and selling foods that we know have bad health effects – those high in sugar, sodium, saturated fat, and calories.

    In the future, convincing evidence will show that certain types of food processing may cause serious health problems. Until then, however, misleading and shocking claims about ultra-processed foods are a real problem.
  • Fasolada recipe

    Fasolada recipe

     Fasolada is a traditional Greek dish that has stood the test of time, weaving its way into the hearts and homes of generations. This bean soup, often referred to as the national dish of Greece, is a hearty and nutritious concoction that showcases the simplicity and richness of Mediterranean cuisine. Its origins date back centuries, and its popularity endures as a beloved staple in Greek households. In this comprehensive guide, we will delve into the history, ingredients, preparation, and cultural significance of fasolada, offering you a step-by-step journey to master this culinary masterpiece.

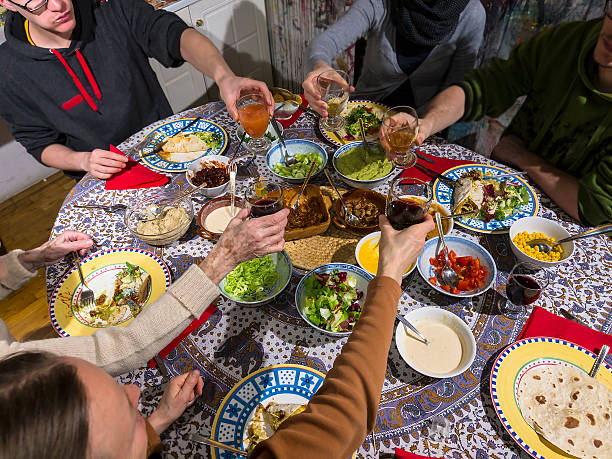
    Historical Background: The roots of fasolada can be traced back to ancient Greece, where it was considered a humble yet wholesome dish. Initially, it was a primary source of sustenance for the working class due to its affordability and nutritional value. Over time, fasolada evolved, incorporating various regional influences and culinary techniques. Today, it is celebrated not only for its delicious taste but also for its cultural significance, often symbolizing Greek hospitality and the joy of communal dining.

    Ingredients: To embark on your fasolada adventure, gather the following ingredients:

    2 cups dried white beans (cannellini or great northern beans)

    1 large onion, finely chopped

    2 carrots, peeled and sliced

    2 celery stalks, chopped

    3 cloves garlic, minced

    1/2 cup extra-virgin olive oil

    1 can (14 oz) crushed tomatoes

    1 tablespoon tomato paste

    1 teaspoon dried oregano

    1 teaspoon dried thyme

    Salt and pepper to taste

    1 bay leaf

    6 cups vegetable or chicken broth

    Fresh parsley, chopped (for garnish)

    Preparation:

    Bean Soaking: Start by soaking the dried white beans overnight in water. This step ensures that the beans rehydrate and cook evenly.

    Sauté Aromatics: In a large pot, heat olive oil over medium heat. Add chopped onions, carrots, and celery, sautéing until the vegetables are softened. Stir in minced garlic and cook for an additional minute, allowing the flavors to meld.

    Add Tomatoes: Incorporate the crushed tomatoes, tomato paste, oregano, thyme, salt, and pepper into the pot. Stir well to combine, letting the mixture simmer for a few minutes.

    Combine with Beans: Drain the soaked beans and add them to the pot. Stir gently to coat the beans with the aromatic tomato mixture.

    Simmering: Pour in the vegetable or chicken broth, add the bay leaf, and bring the pot to a gentle boil. Reduce the heat to low, cover, and let it simmer for about 1.5 to 2 hours or until the beans are tender.

    Adjust Seasoning: Taste the soup and adjust the seasoning if needed. Add more salt, pepper, or herbs to achieve the desired flavor profile.

    Serve with Garnish: Once the fasolada reaches the perfect consistency, remove the bay leaf, and ladle the soup into bowls. Garnish each serving with a generous sprinkle of fresh parsley.

    Cultural Significance: Beyond its delicious taste, fasolada holds cultural significance in Greece. It is often associated with family gatherings, celebrations, and communal meals. The act of sharing a pot of fasolada symbolizes warmth, hospitality, and the importance of enjoying good food in the company of loved ones. Many Greeks consider fasolada a comforting reminder of their heritag

  • Cherry pie recipe australia

    Cherry pie recipe australia

    Australia, a land of diverse landscapes and rich culinary traditions, offers a unique twist to the classic cherry pie recipe. As we embark on this gastronomic adventure, we’ll explore the vibrant flavors and techniques that make the Australian cherry pie a delightful treat for any occasion.

    Ingredients:

    Cherries: Start with fresh, plump cherries. Opt for local Australian varieties like Tasmanian black cherries or Bing cherries for an authentic taste. Aim for around 4 cups of pitted cherries.

    Pastry Dough: Create a buttery and flaky crust using 2 ½ cups of all-purpose flour, a pinch of salt, 1 cup of unsalted butter (cold and cut into cubes), and around 6 tablespoons of ice water.

    Sugar: Use a combination of white and brown sugar for the filling. Approximately 1 cup, with adjustments based on the sweetness of the cherries.

    Cornstarch: To thicken the filling, add 2-3 tablespoons of cornstarch. This ensures a perfect consistency without compromising the cherry flavor.

    Lemon Juice: Enhance the tartness with 1-2 tablespoons of fresh lemon juice. It adds a zesty balance to the sweetness of the cherries.

    Vanilla Extract: Introduce depth of flavor with 1 teaspoon of vanilla extract. This elevates the overall taste profile of the pie.

    Egg Wash: For a golden-brown finish, prepare an egg wash using one beaten egg and a tablespoon of water.

    Optional: Almond Extract or Kirsch: Consider adding a teaspoon of almond extract or a splash of Kirsch for an extra layer of complexity.

    Procedure:

    Prepare the Cherries: Wash, pit, and halve the cherries. Ensure they are ripe and juicy for the best flavor. Toss them in lemon juice to preserve their vibrant color.

    Make the Pastry Dough: In a large bowl, combine the flour and salt. Add the cold butter cubes and use a pastry cutter or your fingers to incorporate until the mixture resembles coarse crumbs. Gradually add ice water, mixing until the dough comes together. Divide into two discs, wrap in plastic, and refrigerate for at least 30 minutes.

    Roll Out the Dough: On a floured surface, roll out one disc to fit your pie dish. Place it in the dish and trim the edges. Roll out the second disc for the top crust or lattice, depending on your preference.

    Preheat the Oven: Preheat your oven to 375°F (190°C).

    Prepare the Filling: In a bowl, combine the cherries, sugar, cornstarch, and vanilla extract. Toss until the cherries are evenly coated.

    Fill the Pie: Pour the cherry filling into the prepared pie crust. If using a lattice top, weave strips of dough over the filling. Otherwise, place the second rolled-out crust over the filling, seal the edges, and cut slits for ventilation.

    Egg Wash: Brush the top crust with the egg wash to achieve a glossy, golden finish.

    Bake: Place the pie in the preheated oven and bake for 45-55 minutes or until the crust is golden and the filling is bubbly. Cover the edges with foil if they brown too quickly.

    Cool and Serve: Allow the pie to cool for at least an hour before serving. This ensures the filling sets and intensifies in flavor. Serve slices with a dollop of vanilla ice cream for an extra indulgence.

    Conclusion:

    Indulging in the art of crafting an Australian cherry pie is not just a culinary experience; it’s a celebration of the country’s diverse produce and a testament to the joy shared through good food. With each slice, savor the melding of sweet and tart notes, encapsulated in a buttery crust – a true manifestation of the Down Under’s culinary excellence.

  • Singapore satay sauce recip

    Singapore satay sauce recip

     Satay, a beloved street food in Singapore, is incomplete without its signature satay sauce. This delectable and versatile condiment adds a burst of flavor to skewered meats, making it a favorite among locals and visitors alike. In this comprehensive guide, we’ll explore the intricacies of crafting an authentic Singapore Satay Sauce that captures the essence of the city-state’s vibrant culinary scene.

    Ingredients:

    1 cup roasted peanuts

    2 tablespoons vegetable oil

    3 cloves garlic, minced

    1 large onion, finely chopped

    1 lemongrass stalk, bruised and chopped

    2 teaspoons ground coriander

    1 teaspoon ground cumin

    1 teaspoon turmeric powder

    1 tablespoon tamarind paste

    1 cup coconut milk

    2 tablespoons soy sauce

    1 tablespoon sugar

    Salt to taste

    Water as needed

    Instructions:

    Roast the Peanuts: Begin by roasting the peanuts in a dry pan until they turn golden brown. This process enhances their flavor and adds a delightful nuttiness to the satay sauce. Once roasted, allow them to cool before grinding.

    Prepare the Aromatics: In a large saucepan, heat the vegetable oil over medium heat. Add minced garlic, chopped onions, and lemongrass. Sauté until the onions become translucent and the mixture releases a fragrant aroma.

    Spice Infusion: Introduce ground coriander, ground cumin, and turmeric powder to the aromatic base. Stir well to combine, allowing the spices to bloom and infuse the mixture with their rich flavors.

    Tamarind Tang: Incorporate the tamarind paste, adding a tangy dimension to the satay sauce. This ingredient plays a crucial role in balancing the flavors and giving the sauce its distinctive taste.

    Creamy Coconut Blend: Pour in the coconut milk, stirring continuously to create a smooth, creamy base. This not only adds a luscious texture but also complements the spices, creating a harmonious flavor profile.

    Umami Boost with Soy Sauce: Enhance the savory notes by introducing soy sauce to the mixture. This provides a umami kick that elevates the overall taste of the satay sauce.

    Sweet Harmony: Add sugar to achieve the desired level of sweetness. Adjust the quantity based on personal preference. Remember, the sweetness should balance the savory and tangy elements for a well-rounded flavor.

    Peanut Power: Grind the roasted peanuts into a coarse powder. Add this to the sauce, stirring continuously. The peanuts not only thicken the sauce but also impart a robust, nutty undertone that defines authentic Singapore satay sauce.

    Simmer to Perfection: Allow the sauce to simmer over low heat, allowing the flavors to meld together. Stir occasionally to prevent sticking and burning. If the sauce thickens too much, add water gradually until the desired consistency is achieved.

    Seasoning: Taste the satay sauce and adjust the seasoning as needed. Add salt to enhance the overall flavor, ensuring a perfect balance of sweetness, tanginess, and umami.

    Strain (Optional): For a smoother consistency, you can strain the satay sauce to remove any coarse bits. This step is optional and depends on personal preference.

    Serve and Enjoy: Once the satay sauce reaches the desired consistency and flavor, remove it from heat. Let it cool before serving. This versatile sauce can be paired with grilled meats, vegetables, or used as a dipping sauce for satay skewers.

    Conclusion: Embark on a culinary adventure with this authentic Singapore Satay Sauce recipe. From the aromatic blend of spices to the creamy coconut and the nutty richness of roasted peanuts, every element is carefully crafted to deliver a taste of Singapore’s vibrant street food culture. Enjoy the versatility of this sauce

  • Macro friendly recipe

    Macro friendly recipe

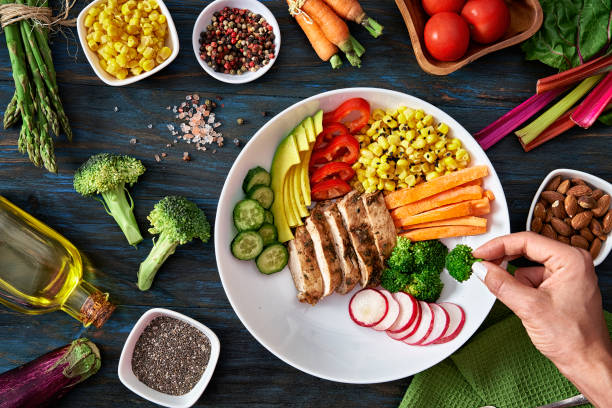
    In the realm of fitness and nutrition, finding delicious and macro-friendly recipes that support your goals can be a game-changer. One such recipe that ticks all the boxes for taste, nutrition, and convenience is the Protein-Packed Chicken and Quinoa Power Bowl. Packed with lean protein, complex carbohydrates, and a variety of colorful veggies, this dish is not only a treat for your taste buds but also a boon for your macros.

    Ingredients:

    Chicken Breast (8 oz): A lean source of high-quality protein that promotes muscle growth and repair.

    Quinoa (1 cup, uncooked): A complex carbohydrate with a balanced profile of essential amino acids, providing sustained energy.

    Broccoli (1 cup, chopped): Rich in fiber, vitamins, and minerals, adding a nutritional punch to the bowl.

    Cherry Tomatoes (1 cup, halved): Bursting with antioxidants and a sweet flavor to enhance the dish.

    Bell Peppers (1 cup, diced): Colorful and crunchy, bell peppers provide vitamins and add a visual appeal.

    Olive Oil (1 tablespoon): A source of healthy fats, enhancing the flavor and aiding in nutrient absorption.

    Garlic (2 cloves, minced): Adding a savory depth to the dish while offering potential health benefits.

    Lemon (1, juiced): Providing a zesty freshness and a dose of vitamin C.

    Instructions:

    Cooking Quinoa:

    Rinse 1 cup of quinoa under cold water.

    Combine quinoa with 2 cups of water in a saucepan.

    Bring to a boil, then reduce heat, cover, and simmer for 15 minutes.

    Fluff quinoa with a fork and set aside.

    Prepping Chicken:

    Season chicken breast with salt, pepper, and your favorite herbs.

    In a skillet, heat 1 tablespoon of olive oil over medium heat.

    Cook chicken breast for 5-7 minutes per side or until cooked through.

    Let it rest before slicing.

    Sautéing Veggies:

    In the same skillet, add minced garlic and sauté for 1-2 minutes.

    Add broccoli, bell peppers, and cherry tomatoes.

    Cook until veggies are tender-crisp.

    Assembling the Power Bowl:

    In individual bowls, layer cooked quinoa as the base.

    Top with sliced chicken and sautéed veggies.

    Drizzle with lemon juice for a burst of freshness.

    Customization and Serving:

    Feel free to customize with your favorite sauces or dressings.

    Add a sprinkle of herbs, nutritional yeast, or a dollop of Greek yogurt for extra flavor.

    Serve immediately and enjoy your protein-packed power bowl!

    Nutritional Benefits:

    Protein: Chicken breast is a lean source of protein essential for muscle repair and growth.

    Carbohydrates: Quinoa provides complex carbohydrates for sustained energy and satiety.

    Fiber and Micronutrients: Broccoli, bell peppers, and cherry tomatoes offer fiber, vitamins, and minerals.

    Healthy Fats: Olive oil contributes heart-healthy fats, aiding in nutrient absorption.

    Conclusion: The Protein-Packed Chicken and Quinoa Power Bowl is not just a meal; it’s a nutritional powerhouse designed to support your macros while tantalizing your taste buds. Incorporating a variety of nutrient-dense ingredients, this recipe provides a balanced combination of protein, carbohydrates, and fats, making it a delicious and macro-friendly option for those committed to a healthy and active lifestyle. So, grab your apron and embark on a culinary journey that nourishes both your body and your taste buds!

  • Fettuccine chicken carbonara recipe

    Fettuccine chicken carbonara recipe

     Indulge in the velvety richness of a classic Fettuccine Chicken Carbonara, where succulent pieces of chicken meet the creamy embrace of a luxurious carbonara sauce. This timeless Italian dish is a symphony of flavors, combining the silkiness of egg-based sauce with the savory notes of pancetta, Parmesan cheese, and perfectly cooked fettuccine. Follow this comprehensive 1000-word recipe to bring this culinary masterpiece to your own kitchen.

    Ingredients:

    1 pound (450g) fettuccine pasta

    2 tablespoons olive oil

    1 pound (450g) boneless, skinless chicken breasts, diced

    Salt and black pepper to taste

    1 cup (240ml) heavy cream

    4 large egg yolks

    1 cup (100g) grated Parmesan cheese

    8 ounces (225g) pancetta or bacon, diced

    4 garlic cloves, minced

    1/2 cup (120ml) dry white wine (optional)

    Fresh parsley, chopped (for garnish)

    Instructions:

    Prepare the Ingredients: Start by gathering all the ingredients and bringing them to room temperature. This ensures even cooking and optimal flavor integration.

    Cook the Fettuccine: Boil a large pot of salted water and cook the fettuccine according to the package instructions until al dente. Once cooked, drain the pasta, reserving about a cup of pasta water.

    Sauté the Chicken: In a large skillet, heat olive oil over medium-high heat. Season the diced chicken with salt and black pepper, then add it to the skillet. Sauté until the chicken is golden brown and cooked through. Remove the chicken from the skillet and set it aside.

    Prepare the Carbonara Sauce: In a bowl, whisk together the egg yolks, heavy cream, and grated Parmesan cheese until well combined. This forms the base of the decadent carbonara sauce.

    Cook the Pancetta and Garlic: In the same skillet, add diced pancetta or bacon and cook until it becomes crispy. Add minced garlic to the pan and sauté until fragrant, being careful not to let it burn.

    Deglaze with White Wine (Optional): For an extra layer of flavor, deglaze the skillet with dry white wine. Allow it to simmer for a couple of minutes, letting the alcohol evaporate and the flavors meld.

    Combine the Ingredients: Return the cooked chicken to the skillet. Lower the heat to medium and pour the carbonara sauce over the chicken and pancetta mixture. Stir gently to combine, allowing the sauce to thicken and coat the ingredients evenly.

    Bring It All Together: Add the cooked fettuccine to the skillet, tossing everything together to ensure the pasta is thoroughly coated in the creamy carbonara sauce. If the sauce is too thick, use the reserved pasta water a little at a time to reach the desired consistency.

    Serve and Garnish: Plate the Fettuccine Chicken Carbonara and garnish with freshly chopped parsley. The vibrant green adds a pop of color and a touch of freshness to the dish.

    Enjoy Your Culinary Masterpiece: Serve immediately, savoring the harmonious blend of creamy sauce, tender chicken, and perfectly cooked fettuccine. Pair it with a glass of your favorite white wine for a truly indulgent dining experience.

    Conclusion: With this detailed 1000-word recipe, you can now confidently recreate a restaurant-quality Fettuccine Chicken Carbonara in the comfort of your own kitchen. Immerse yourself in the creamy, savory goodness of this classic Italian dish, and delight your taste buds with each mouthwatering bite. Whether for a special occasion or a comforting weeknight meal, this recipe is sure to become a favorite in your culinary repertoire.

  • Green beans recipe indian

    Green beans recipe indian

    Embark on a culinary journey through the vibrant flavors of Indian cuisine with this delightful green beans recipe. Known for its rich blend of spices, Indian cooking promises an explosion of taste, and this dish is no exception. In this detailed guide, we’ll take you step by step through the process of creating a mouthwatering Indian-style green beans dish that will leave your taste buds tingling with joy.

    Ingredients:

    500g fresh green beans, washed and trimmed

    2 tablespoons vegetable oil

    1 teaspoon mustard seeds

    1 teaspoon cumin seeds

    1 large onion, finely chopped

    2 tomatoes, diced

    2 green chilies, finely chopped

    1 tablespoon ginger-garlic paste

    1 teaspoon turmeric powder

    1 teaspoon cumin powder

    1 teaspoon coriander powder

    1/2 teaspoon red chili powder (adjust according to spice preference)

    Salt to taste

    Fresh coriander leaves for garnish

    Instructions:

    Prepping the Green Beans:

    Wash the green beans thoroughly and trim the ends.

    Cut the beans into bite-sized pieces or leave them whole, depending on your preference.

    Tempering:

    Heat vegetable oil in a large pan over medium heat.

    Add mustard seeds and cumin seeds. Allow them to splutter, releasing their aromatic flavors.

    Sautéing the Aromatics:

    Add finely chopped onions and sauté until they turn golden brown.

    Stir in the ginger-garlic paste and cook for an additional 1-2 minutes.

    Adding Spice:

    Incorporate turmeric powder, cumin powder, coriander powder, and red chili powder. Mix well to coat the onions with the spices.

    Tomato Tanginess:

    Add diced tomatoes and green chilies. Cook until the tomatoes are soft and the oil begins to separate from the masala.

    Introducing Green Beans:

    Toss in the prepared green beans and mix them thoroughly with the spice mixture.

    Add salt to taste and stir well.

    Cooking to Perfection:

    Cover the pan with a lid and let the green beans cook on medium-low heat. Stir occasionally to ensure even cooking.

    Cook until the green beans are tender yet retain a slight crunch, approximately 15-20 minutes.

    Garnishing:

    Once the green beans are cooked to perfection, garnish the dish with fresh coriander leaves.

    Serve and Enjoy:

    Your authentic Indian green beans are now ready to be served! Enjoy them with steamed rice or Indian bread like naan or chapati.

    Conclusion:

    Indulge in the rich tapestry of Indian flavors with this aromatic and spicy green beans recipe. The blend of spices, the freshness of green beans, and the expertise of Indian culinary techniques come together to create a dish that’s both satisfying and memorable. So, gather your ingredients and let the aroma of Indian spices fill your kitchen as you prepare this delectable green beans masterpiece. Your taste buds will thank you for the culinary adventure!

  • Biscoff cookie recipe

    Biscoff cookie recipe

    Embark on a delightful culinary adventure with this comprehensive Biscoff cookie recipe that will guide you through the process of creating these irresistible, spiced, and crunchy treats. Originating from Belgium, Biscoff cookies, also known as speculoos, have gained international fame for their unique blend of flavors. This homemade version ensures you experience the joy of crafting these cookies from scratch, with ingredients you can find in your pantry.

    Ingredients:

    1 cup unsalted butter, softened

    1 cup granulated sugar

    1 cup packed brown sugar

    2 large eggs

    1 teaspoon pure vanilla extract

    3 cups all-purpose flour

    1 teaspoon baking soda

    1/2 teaspoon baking powder

    1/2 teaspoon salt

    2 teaspoons ground cinnamon

    1/2 teaspoon ground nutmeg

    1/4 teaspoon ground cloves

    Instructions:

    Prepare the Ingredients: Ensure all ingredients are at room temperature. Preheat your oven to 350°F (180°C) and line baking sheets with parchment paper.

    Creaming the Butter and Sugars: In a large mixing bowl, cream together the softened butter, granulated sugar, and brown sugar until light and fluffy. This can be done using a stand mixer or a hand mixer.

    Adding Eggs and Vanilla: Add the eggs one at a time, beating well after each addition. Then, mix in the vanilla extract until well combined.

    Combining Dry Ingredients: In a separate bowl, whisk together the all-purpose flour, baking soda, baking powder, salt, cinnamon, nutmeg, and ground cloves.

    Incorporating Dry Ingredients: Gradually add the dry ingredients to the wet ingredients, mixing just until combined. Be cautious not to overmix, as this can lead to a dense texture.

    Chilling the Dough: Divide the cookie dough in half and shape each portion into a disc. Wrap them in plastic wrap and refrigerate for at least 1-2 hours or until the dough is firm.

    Rolling and Cutting: Preheat your oven again to 350°F (180°C). On a lightly floured surface, roll out the chilled dough to about 1/4 inch thickness. Use Biscoff cookie cutters or any shape you prefer to cut out the cookies.

    Baking: Place the cut cookies on the prepared baking sheets, leaving space between each. Bake for 10-12 minutes or until the edges are golden brown. Keep a close eye on them to avoid over-baking.

    Cooling: Allow the cookies to cool on the baking sheets for a few minutes before transferring them to a wire rack to cool completely.

    Optional: Biscoff Spread Filling (Speculoos Spread): For an extra indulgence, consider spreading Biscoff cookie butter between two cookies to create sandwich cookies.

    Conclusion:

    Congratulations, you’ve successfully embarked on a culinary journey to create homemade Biscoff cookies. The warmth of cinnamon, nutmeg, and cloves combined with the sweetness of the cookie creates a delightful treat that is sure to be a hit. Share these cookies with loved ones or savor them on your own – either way, you’ve mastered the art of making Biscoff cookies from scratch. Enjoy the sweet rewards of your baking adventure!

  • Dairy free brownie recipe

    Dairy free brownie recipe

    Brownies are a timeless treat that appeals to the sweet tooth in all of us. However, for those who follow a dairy-free lifestyle due to lactose intolerance, dietary restrictions, or personal choices, finding a delicious brownie recipe can be challenging. Fear not, as we present a tantalizing dairy-free brownie recipe that not only meets the standards of traditional brownies but surpasses them in flavor and richness. Let’s embark on a culinary journey to create a batch of irresistible dairy-free brownies that will leave your taste buds dancing with joy.

    Ingredients:

    2 cups all-purpose flour

    1 ¾ cups granulated sugar

    1 cup dairy-free margarine or coconut oil (melted)

    1 cup unsweetened applesauce

    1 cup dairy-free dark chocolate chips

    ½ cup cocoa powder (unsweetened)

    4 flax eggs (4 tablespoons ground flaxseed mixed with 10 tablespoons water, set aside to gel)

    1 teaspoon vanilla extract

    1 teaspoon baking powder

    ½ teaspoon salt

    Optional: Chopped nuts or dairy-free chocolate chunks for added texture

    Instructions:

    Preheat your oven to 350°F (175°C) and grease a square baking pan with dairy-free cooking spray or margarine.

    In a medium-sized mixing bowl, combine the melted dairy-free margarine or coconut oil with the granulated sugar. Whisk until the mixture becomes smooth and slightly creamy.

    Add the unsweetened applesauce, flax eggs, and vanilla extract to the sugar mixture. Mix well to ensure all wet ingredients are thoroughly combined.

    In a separate bowl, sift together the all-purpose flour, cocoa powder, baking powder, and salt. Gradually add the dry ingredients to the wet ingredients, stirring continuously to form a smooth batter.

    Melt the dairy-free dark chocolate chips using a double boiler or microwave, stirring at 30-second intervals until fully melted. Gently fold the melted chocolate into the brownie batter, ensuring an even distribution.

    If desired, fold in chopped nuts or dairy-free chocolate chunks for an extra layer of texture and flavor.

    Pour the brownie batter into the prepared baking pan, spreading it evenly with a spatula.

    Bake in the preheated oven for 25-30 minutes or until a toothpick inserted into the center comes out with a few moist crumbs. Be cautious not to overbake, as the goal is to achieve a fudgy texture.

    Allow the brownies to cool in the pan for at least 15 minutes before transferring them to a wire rack to cool completely.

    Once cooled, cut the brownies into squares and indulge in the rich, chocolatey goodness of your homemade dairy-free brownies.

    Conclusion:

    Congratulations! You have successfully created a batch of decadent dairy-free brownies that rival their traditional counterparts. This recipe not only caters to those with dairy restrictions but also provides a delightful treat for anyone seeking a sumptuous chocolate experience. Share these indulgent brownies with friends and family, and revel in the satisfaction of creating a delectable dessert that proves dairy-free can be just as delicious. Enjoy every blissful bite!

  • Banana bread recipe without eggs

    Banana bread recipe without eggs

     Banana bread is a timeless classic, loved by many for its moist texture and delightful flavor. If you’re exploring egg-free options, you’re in for a treat! In this comprehensive guide, we’ll walk you through a delicious vegan banana bread recipe that not only omits eggs but also maintains the rich, indulgent taste you crave. Get ready to embark on a culinary journey and create a mouthwatering loaf that will have everyone asking for seconds.

    Ingredients:

    3 ripe bananas

    1/2 cup vegetable oil

    1 cup sugar

    1 teaspoon vanilla extract

    1 1/2 cups all-purpose flour

    1 teaspoon baking soda

    1/4 teaspoon salt

    1 teaspoon ground cinnamon

    1/4 cup plant-based milk (such as almond or soy)

    Step 1: Preparing the Bananas Start by preheating your oven to 350°F (175°C) and greasing a standard-sized loaf pan. Peel and mash the ripe bananas in a large mixing bowl. The riper the bananas, the sweeter your banana bread will be.

    Step 2: Wet Ingredients Add the vegetable oil, sugar, and vanilla extract to the mashed bananas. Mix well until the ingredients are thoroughly combined. This oil-based approach replaces the binding properties of eggs, ensuring your banana bread remains moist and delicious.

    Step 3: Dry Ingredients In a separate bowl, whisk together the all-purpose flour, baking soda, salt, and ground cinnamon. Gradually add the dry mixture to the wet ingredients, stirring continuously to form a smooth batter. The cinnamon adds a warm, aromatic touch to the bread, enhancing its overall flavor.

    Step 4: Incorporating Plant-Based Milk Pour in the plant-based milk of your choice and continue to mix until the batter achieves a consistent and slightly thick texture. This addition ensures your banana bread remains moist without the need for eggs.

    Step 5: Pouring the Batter Transfer the batter into the greased loaf pan, spreading it evenly. Smooth the surface with a spatula to create an aesthetically pleasing finish.

    Step 6: Baking Place the pan in the preheated oven and bake for approximately 60-70 minutes, or until a toothpick inserted into the center comes out clean. Keep an eye on your banana bread during the last few minutes to avoid over-baking.

    Step 7: Cooling Once the banana bread is done, allow it to cool in the pan for about 10 minutes. Then, transfer it to a wire rack to cool completely before slicing. This patience ensures a perfect texture and makes slicing easier.

    Step 8: Serving Suggestions Slice your egg-free banana bread into thick, tempting slices. Serve it warm or at room temperature, and consider adding a dollop of vegan butter or a drizzle of maple syrup for an extra touch of indulgence.

    Conclusion: Congratulations! You’ve just crafted a delectable egg-free vegan banana bread that’s sure to impress even the most discerning taste buds. This recipe showcases how simple substitutions can result in a moist and flavorful treat without compromising on taste. Enjoy your creation and share the joy of vegan baking with family and friends!